
Safe Chair Yoga for Osteoporosis
My neighbour Margaret, 71, stopped her morning stretches after her bone-density scan came back low. Not because she felt pain that day, but because she was suddenly scared of doing the wrong move. She would sit at her kitchen table at 7:30 in the morning, coffee going cold, wondering whether bending to pick up a dropped spoon could hurt her back. That fear kept her sitting still for months, making her stiffer and weaker.
This is a guide to safe chair yoga for osteoporosis: slow, supported, seated movement. It is not a treatment for bone loss and will not rebuild bone — just a way to keep moving upright, close to a sturdy chair, without loaded bending or twisting.
Please talk to your doctor first. Osteoporosis affects everyone differently, and your doctor or physiotherapist knows your scan results, fracture history, and limits. Show them this routine if you can. Stop straight away if anything hurts, feels sharp, or feels unstable. Mild effort is fine. Pain is not a sign to push through.
Why This Routine Is Different
Most general chair yoga flows assume a healthy spine that can fold and twist without worry. With low bone density, those moves are the ones to leave out. Forward-bending twists, deep forward folds, sit-ups, and loaded flexion — where the spine bends forward under weight — can put too much pressure on fragile vertebrae. This routine removes them completely.
What is left is still useful. What works best is a tall spine, small controlled arm and leg movements, and the chair as support throughout. You stay seated, feet flat, hands near the chair arms, so you can steady yourself at any second.
Think of it as maintenance for daily life: getting up from a chair, reaching a shelf at shoulder height. It is general wellness only, alongside your doctor’s advice, never instead of it.
You need one sturdy chair with armrests, on a non-slip surface, back against a wall if possible. Wear flat shoes or non-slip socks, keep water nearby, and allow 15 minutes. If you only have 8 minutes, do the first half and stop.
The Routine: 7 Slow, Supported Moves
Move slowly and breathe normally. Never hold your breath or force a stretch. If a move does not feel right, skip it.
1. Tall Seated Posture and Easy Breathing
Sit towards the front half of the chair, feet flat, knees over your ankles, hands on your thighs. Lift your head gently towards the ceiling, drop your shoulders, breathe in for 3 counts, out for 4. Repeat 5 times.
Best for: settling nerves and checking that your chair feels steady before you start.
2. Gentle Shoulder Rolls
Back tall, hands on thighs, roll both shoulders slowly up, back, and down in a small circle — about the size of an orange. Do 5 rolls, rest, then 5 more. Keep your chin level and do not lean forward to enlarge the circle.
Best for: easing morning stiffness in the shoulders and upper back without spinal bending.
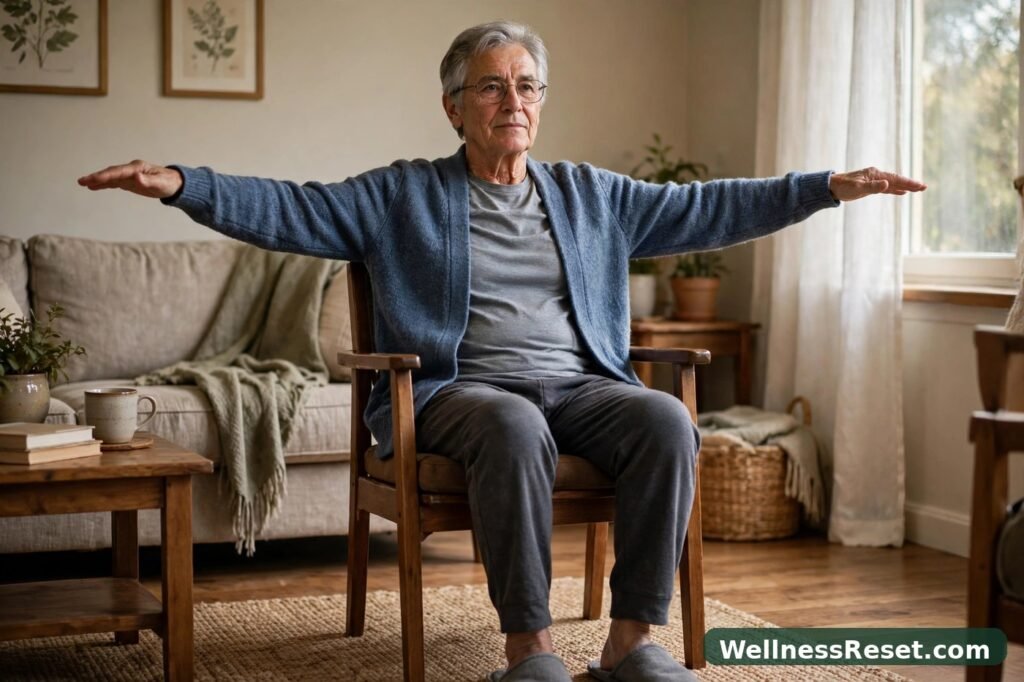
3. Seated Arm Raises to Shoulder Height Only
This is the key limit: arms to shoulder height, no higher, never with weights. Breathe in and float both arms out to the sides until level with your shoulders, palms down. Breathe out and lower them slowly to your thighs. Repeat 6 times. If one arm feels tighter, let it rise lower. Comfort, not symmetry, is the goal.
Best for: shoulder mobility for everyday reaching, with the spine fully upright.
4. Seated Marching in Place
Hold the chair arms. Lift your right foot 3 to 4 inches, lower it, then lift the left the same height — one round. Do 10 slow rounds, back tall, feet landing softly. If wobbly, keep both hands on the arms and lift less.
Best for: leg strength for standing up and feeling steadier on your feet.

5. Gentle Seated Side Stretch (Upright Only)
Sit tall, feet flat, left hand on the chair arm. Raise your right arm to shoulder height, lean only 2 to 3 inches left, chest facing forward. Feel a light side stretch, not a pull in your back. Hold 3 breaths, return upright, repeat other side. Do 2 rounds each side. No forward bend, no twist.
Best for: side-body flexibility for reaching and dressing, without loading the spine forward.
6. Ankle Circles and Toe Taps
Heels on the floor, tap your toes down 10 times. Then lift one foot slightly and draw 5 slow ankle circles each way, then switch feet. In my experience, this is the move people notice most — stairs feel less clumsy afterwards.
Best for: ankle mobility and steadier first steps after standing.
7. Calm Seated Finish
Feet flat, hands on knees, back tall. Breathe normally for 60 seconds. To stand, scoot forward, hands on the chair arms, straight back, and press up through your legs. Sit back down if dizzy.
Step-by-Step: Your 15-Minute Session
- Set up: sturdy chair with armrests, wall behind it, water nearby, phone on silent. (2 minutes)
- Tall posture and easy breathing, 5 breaths. (2 minutes)
- Shoulder rolls, 2 sets of 5. (2 minutes)
- Arm raises to shoulder height, 6 slow repetitions. (2 minutes)
- Seated marching, 10 slow rounds, hands on chair arms. (3 minutes)
- Upright side stretch, 2 rounds each side. (2 minutes)
- Ankle circles and toe taps. (1 minute)
- Calm seated finish, 60 seconds, then stand up in stages. (1 minute)
Start 3 days a week, with a rest day between sessions, and build up occassionally to 4 or 5 days only if it stays easy and your doctor agrees.
For a broader start, see Chair Yoga for Seniors: A Safe 15-Minute Routine to Start at Home, and later 12 Chair Yoga Poses Every Beginner Should Know — leaving out any forward folds or twists there, and keeping this article’s shoulder-height and upright-spine limits.
Problem | Quick Fix
| Problem | Quick fix |
|---|---|
| Chair slides on a smooth floor | Put the chair back against a wall and place a non-slip mat under its legs |
| You round forward | Scoot back, hands on thighs, and lift your head tall again |
| Shoulders creep up towards your ears | Drop them on every out-breath and shrink the movement by half |
| One side feels much tighter | Let that side move less; never force it to match the other side |
| You feel dizzy standing | Sit back down, drink water, and stand again more slowly |
| The routine feels too easy | Add 2 more slow repetitions, not bigger movements or weights |
| A move causes sharp pain | Stop it completely and tell your doctor before trying it again |

Common Mistakes to Avoid
Bending forward to “stretch deeper.” This is the biggest mistake with low bone density, and it often comes from habit. Old advice told everyone to fold forward and touch their toes. Leave that behind here: a tall spine with a small movement is the safe version of deep.
Twisting while seated. Cross-body twists and wringing out the waist load the spine in rotation. If a pose asks you to twist, skip it. Gentle head turns are different — a small neck movement — but keep them slow and small.
Using weights too soon. Light weights add load to movements we are keeping gentle. Use no weights for at least the first month, and only add anything if your doctor or physiotherapist clears it.
Rushing the marching. Fast, stamping marching turns a balance exercise into a jarring one. Slow and soft wins; ragged breathing means you are going too fast.
Practising on a soft or wheeled chair. A low sofa or wheeled office chair makes every move less stable. A firm dining chair with armrests is worth more than any fancy equipment.

Final Words
Margaret now does this routine three mornings a week, usually right after breakfast. She still checks with her doctor at every appointment. What changed is not her bones — this routine does not claim to change them — but her confidence. She moves a little more and no longer spends the morning afraid of her own chair.
That is an honest goal here. Move slowly, stay upright, use your chair, and stop when your body asks you to. A gentle routine you actually do, safely, beats a bold one you are scared to start.
FAQ
Is chair yoga safe if I have osteoporosis?
It can be, if the routine avoids forward bending, twisting, and loaded flexion, and your doctor has cleared you for gentle seated movement. Your doctor’s advice comes first.
How often should I do this routine?
Start 3 days a week. If you feel fine the next day and your doctor agrees, build up to 4 or 5 days. Skip a day if tired, sore, or unwell.
Do I need special equipment?
No — just a sturdy chair with armrests, a non-slip surface, and flat shoes or non-slip socks. No weights or bands are needed.
What should I do if a move hurts?
Stop straight away. Do not work through sharp, new, or increasing pain. Rest, and mention it to your doctor before trying it again.
Can this routine improve my bone density?
No, and no honest article should promise that. This is general wellness for flexibility and steadiness; bone-density treatment is for you and your doctor to decide.